Nailbox Candy Cane Manicure
Good morning my lovelies, it is absolutely freezing today me and Lexi are both wrapped up in the quilt trying to keep warm like a couple of penguins. I really wanted to try and get this post up last night but my brother and future sister in law (who is also my best friend) came around for an unexpected visit, and then Lexi was being stubborn about going to bed. So today I have for you my manicure using all my nail polish goodies from my November Nailbox, click on the link if you haven't already checked that out. It was crammed full of classic festive colours to use for this coming month.

Here is the star of the show my little Uber Chic penguin decal, I used my brand new Uber Chic Christmas plate to make my little penguin. First I picked up the image and stamped him onto my Uber Chic mat, then I used True Brit London's Park Lane to colour in his little hat with a dotting tool. For his little beak I used my Born Pretty stamping polish in gold, unfortunately his beak did smudge a bit but for my first try at making a decal I was still really happy with him. For his body I used a larger dotting tool with China Glaze White on White. Once the polish was dry I put a good layer of top coat on top and left him to dry.
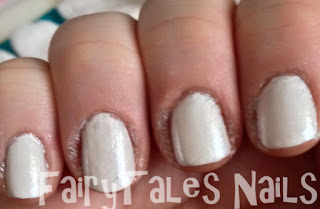
When I received my Festive Nailbox my first thought was that the nail polish's we were given are the perfect colours for a candy cane manicure. So with that in mind I began planning out my festive fingers mani, first things first I used 2 coats of China Glaze White on White for my base and then topped that with OPI's Happy Anniversary. This gave the base a lovely silvery glow, I was happy with the effect I got from this polish as it made the background look shiny like a candy cane. Because I wanted my nails to be white and not silver I used the white base instead of just using the OPI on it's own but you can get Happy Anniversary opaque in 3 coats if you wanted to just use that instead.
Next I grabbed my Ejiubas Christmas plate and used the candy cane stripe image, I am very pleased to say that both True Brit London Park Lane and Rimmel Double Decker Red stamp wonderfully. Both are very opaque polishes so I was hoping they would. To do my candy cane stripes I placed a dot of both polishes on each stripe and swiped upwards. Sometimes the colours did bleed into each other so it would take a few times to get it right. I will have a full review of this plate coming up at the beginning of December. It is an excellent plate etched so well and I didn't have any problems picking up the image.
I placed my candy cane stripes on all of my fingers except my ring finger which I wanted to save for a special little decal I was working on. Once my stripes were fully dry I went over all the nails with some HK girl top coat to seal in the design.

Here is the star of the show my little Uber Chic penguin decal, I used my brand new Uber Chic Christmas plate to make my little penguin. First I picked up the image and stamped him onto my Uber Chic mat, then I used True Brit London's Park Lane to colour in his little hat with a dotting tool. For his little beak I used my Born Pretty stamping polish in gold, unfortunately his beak did smudge a bit but for my first try at making a decal I was still really happy with him. For his body I used a larger dotting tool with China Glaze White on White. Once the polish was dry I put a good layer of top coat on top and left him to dry.
Once my little guy was fully dry I used a plastic cuticle pusher to get under the edges and pull him off my mat, I then brushed a small bit of top coat onto my nail and lined my penguin up to where I wanted him. After he was in place I top coated again with HK girl top coat to seal him in and I was all done.
I am really happy with the results, it's so nice to see that all the practising I've been doing is finally starting to pay off. Now that I have had success with my penguin decal I am sure there will be loads more popping up in my future manicures.
I hope you have enjoyed this post, if you got a November Nailbox I would love to see what festive mani's you've came up with. As always I hope you are having a fantastic nail day, if you have any tips for me on making stamping decals I would love for you to leave them in the comments section below. My next post will be my review om Novembers Meebox, hope to see you then.


Love it! Super impressed with how you managed to get the stripes all from a single stamp! I wouldnt even try that haha! x
ReplyDeleteThanks Hun :) I don't think it would have worked on all stamping plates but because the Ejiubas plate is really deep the polish stays were you put it :) x
Delete